
Command Line Interfaces (CLI) are simply cool! This isn’t a quote you hear that often. It’s a shame, because they really are! You have probably heard of Graphical Unit Interfaces (GUIs) before, and if not, you’ve most definitely used one. The same goes for CLI. If you’re a developer and haven’t heard of it before, don’t worry; you’ve most probably used it without even knowing it. There are so many CLIs for applications that you probably didn’t know had one, for example, VLC, Blender, GIMP, and more.
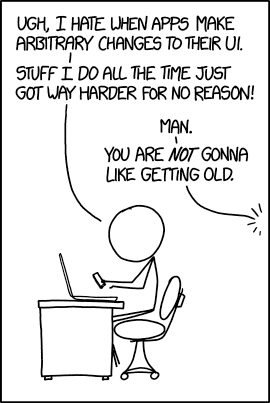
CLIs are very powerful, especially for tasks that involve file manipulation or system configuration. When it comes to scripting and automation, CLI is essential since it allows users to create scripts that execute a series of commands. CLI commands usually follow a standardized format across different operating systems and platforms, providing a consistent experience for users. I mean, even XKCD has made a comic about it, so it must be correct, right?
Anyhow, what exactly is a CLI, and why do we use it?
Command Line Interface (CLI) is a text-based method for interacting with computers, offering a direct and efficient way to issue commands. Compared to the Graphical Unit Interface (GUI), CLI relies on text-based commands for interaction, emphasizing efficiency and automation, while GUI employs graphical elements for a visually intuitive and user-friendly experience. Doing a task for the first time in a GUI would probably go faster, but the same task performed thousands of times will most probably be done faster in a CLI.
Cool! How do we do it?
We can create a CLI tool with Python by using one of the following libraries: Click, Argparse, Fire, or Docopt. All of them have their advantages, but I chose Click because of its simple and intuitive syntax, automatic help page generation, and context-aware callback functions. When we’re creating the CLI, we’ll use Command Line Interface Guidelines. If you’re interested in reading them more in detail, see the following link: CLIG.
For this blog post, we’ll create a password generator that uses the secrets module in Python. The CLI tool is going to be named by the guardian.
Requirements
- The tool should be able to run with the following command
byteguardian generate_password - It should have the following optional options:
- Length of password.
- Include symbols in the password.
- Include uppercase characters.
- Include numbers.
For example, we should be able to run the following command in our terminal:
byteguardian generate-password --length 21 --include-symbolsEnough talking, let’s start coding!
First, create a new directory to store our code and navigate to the directory:
mkdir byteguardian && cd ./byteguardianSecondly, we need to create a virtual environment and install the required dependencies in that environment.
python3 -m venv .byteguardian_venv && source .byteguardian_venv/bin/activateThis is how our terminal will look (depending on the styling of the terminal, of course):
(.byteguardian_venv)>Once we’re inside the virtual environment, we install Click.
(.byteguardian_venv)> pip install clickAfter the installation is done, create file called commands.py using the following command:
touch commands.pyNow that we have our file, we’ll need to make it a Click command called generate_password.
# commands.py
import secrets
import string
import click

lower_case_alphabet = string.ascii_letters.lower()
upper_case_alphabet = lower_case_alphabet.upper()
symbols = string.punctuation
numbers = string.digits.lower()

@click.command()
@click.option("--length", type=int)
@click.option("--include-symbols", type=bool ,is_flag=True, show_default=True, default=False)
@click.option("--include-numbers", type=bool ,is_flag=True, show_default=True, default=False)
@click.option("--include-uppercase", type=bool, is_flag=True, show_default=True, default=False)
def generate_password(
    length, include_symbols, include_numbers, include_uppercase
) -> None:
		"""This script prints hello NAME COUNT times."""
    sequence = lower_case_alphabet

    if include_symbols:
        sequence += symbols

    if include_numbers:
        sequence += numbers

    if include_uppercase:
        sequence += upper_case_alphabet

    password = "".join(secrets.choice(sequence) for _i in range(length))

    click.echo(password)
A lot of code appeared out of nowhere! But don’t worry!
Firstly, we have the decorators. All the decorators are predefined in Click and will help Click generate extra and sweet functionality. Using the decorator @click.command() will define that the function will be a callable command in the terminal. Bear in mind that function names will be transformed into Kebab-case style, meaning our generate_password is going to be named as generate-password as a command.
Secondly, @click.option() defines an option for the command. In our case, that is, for example, the length of the password. Notice that each option is a parameter in the generate_password function. This is crucial, since otherwise the function will not take the option into account. The naming convention is also a little tricky since the option name (first parameter) needs to match one of the parameters that is defined in generate_password. Otherwise, the CLI will return TypeError: generate_password() got an unexpected keyword argument.
There are a couple of takeaways from this implementation. We don’t return values from the commands;instead, we send the values to stdout using click.echo(). This makes it possible to run the command with other commands, for example, piping.
However, it is not why we’re using Click. As we stated at the beginning of the blog post, we want to use the following command byteguardian generate-password . That means that we need to install the package. We’ll do this by converting our directory into a pyproject using pip to install the package locally and in development mode using the flag —ediable.
Create a pyproject of byteguardian and update the folder structure of the directory.
Before
byteguardian/
	commands.py
After
byteguardian/
	byteguardian/
		commands.py
		__init__.py
		__main__.py
	pyproject.toml
The following is an basic pyproject.toml template that you can use!
[project]
name = "byteguardian"
version = "0.1.0"
authors = [{ name = "YOUR_NAME", email = "YOUR_EMAIL" }]
description = "PROJECT_DESCRIPTION"
requires-python = ">=3.9"
dependencies = [
    "click>=8.1"
]
[build-system]
requires = ["setuptools>=65.5.0", "wheel"]
build-backend = "setuptools.build_meta"

[project.scripts]
byteguardian = "src.__main__:cli"
In order to install our own custom cli package, we can run the following command with the flag —editable to have it in edit mode:
pip install --editable .Use the pip list command to see the packages installed and look at that! We have byteguardian installed as a package.
Package      Version Editable project location
------------ ------- ----------------------------------------------
byteguardian 0.1.0   /path/to/byteguardian
click        8.1.7
pip          23.2.1
setuptools   68.2.2
Before we try the command we implemented, we should see the help page that is generated for us with Click.
byteguardian --helpThis should result in the following:
> byteguardian --help
Usage: byteguardian [OPTIONS] COMMAND [ARGS]...

Options:
  --help  Show this message and exit.

Commands:
  generate-password
Let’s try using our package now and generate a password using the generate-password command.
> byteguardian generate-password --length 31 --include-uppercase --include-symbols --include-numbers
iOPty7Ppz8ykoF&mEaU[C{sqxqKTZhX
And voila! We have now successfully created a CLI tool that can generate passwords for us. And, of course, the password generated isn’t used by anyone or shouldn’t be used by anyone!

